Hey everyone, it’s Jake from your go-to guardrail posts supplier—y’all know the one who actually answers when you text at 7 PM (no, that’s not a generic AI chatbot, promise). This week I’m getting so many DMs and calls about a super specific question: how the heck do you install guardrail posts on a marble surface? Not concrete, not asphalt—marble. You know, that fancy, smooth, porous (wait, sort of porous, anyway) natural stone that’s everywhere in commercial lobbies, public park plazas, museum walkways, even high-end residential driveways. Installing regular guardrail posts there is not the same as slamming them into concrete, that’s for sure. Mess this up, and you’ll end up with posts that lean like a drunk uncle at a wedding, marble chips flying everywhere, or even worse—cracks that ruin a $100 sq ft slab. Been there, fixed that, so let me walk you through the actual, tested steps that work, plus the mistakes I see every contractor and DIYer make when tackling this. Guardrail Posts
First off, let’s get one thing straight: marble is not concrete. It’s a soft, porous natural stone, way easier to damage than you think. I’ve had a contractor bring me a beat-up marble slab last month where they drilled a hole wrong, and half the edge chipped off because they used the wrong drill bit and too much force. So before you even grab any tools, you need to do a quick pre-install check. First, figure out what kind of marble surface you’re working with. Is it polished? Honed? Honed is a little more forgiving, but polished? You have to be extra careful not to scratch or dull the finish. Also, check if the marble is sealed. If it’s new, it might not have a sealer, or an old sealer could be peeling. If you don’t check this first, the adhesive you use won’t stick worth a darn, and you’ll be redoing this whole job in 6 months. I always tell folks to do a simple water test: spray a little water on the spot where you want to put the post. If it beads up, it’s sealed—just give it a quick wipe with isopropyl alcohol to strip a tiny area around where you’re drilling, so the adhesive has something to grab onto. If it absorbs, you’re good to go, just clean the spot with mild dish soap and water to get rid of any dirt, grime, or random gum (yes, we’ve all seen that on public marble plazas).
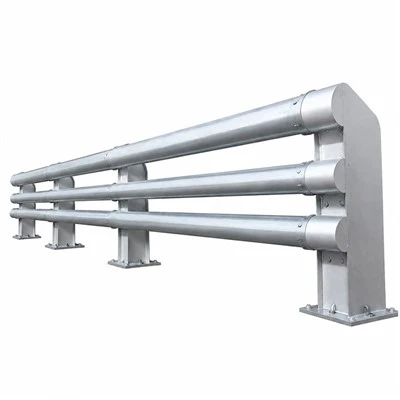
Next, the big one: choosing the right guardrail posts and hardware. Not all posts are made equal for marble. I see guys grabbing the cheapest steel posts off Amazon or a big box store, thinking “it’s a post, right?” No, wait—if you’re putting them on marble, you need posts with a wide base plate, not tiny skinny flanges. The wider the base, the more weight is distributed across the marble, so less pressure on one small spot that could crack the stone. Most standard posts have 4×4 inch base plates, but for marble, I recommend going for 6×6 inch minimum—trust me, that extra 2 inches makes a huge difference. Also, skip the self-drilling post anchors that come with cheap posts. Those are meant for concrete, not marble. You need heavy-duty epoxy anchors made specifically for natural stone, not concrete anchors. I’ve tested so many different epoxies over the years, and the ones that work best for marble are two-part, non-shrinking structural epoxy that’s rated for natural stone. Avoid the cheap “all-purpose” epoxies—those fall off in 6 months, especially if the post is holding up guardrail for pedestrians or small vehicles. Also, get a good quality drill bit: diamond-tipped, not regular masonry bits. Regular masonry bits will bounce all over polished marble, chip the edges, and take forever to drill. Diamond bits cut through marble like butter, as long as you use them right.
Now, let’s get to the actual installation steps—this is where 90% of mistakes happen. First, measure and mark exactly where you want the post. Use a tape measure, a level, and a pencil (or a painter’s marker that wipes off, so you don’t stain the marble) to mark the center of each post. Once you have that, set the post’s base plate on the mark, and trace around it. That way, you know exactly where to drill. Here’s the first critical step: when drilling the hole for the anchor, you don’t want to drill the hole dead center of your traced mark? Wait, no—wait, actually, you do, but you want to drill the hole slightly smaller than the anchor’s size, right? No, wait, hold on—for epoxy anchors in marble, you want to drill a hole that’s about 1/8 inch deeper than the anchor’s length, and 1/16 inch wider than the anchor’s diameter. That gives the epoxy enough space to spread and grip. But here’s the big no-no: don’t drill straight down at an angle. Keep the drill perfectly perpendicular to the marble surface. If you angle it, the anchor will pull out sideways, and the post will lean. I use a drill guide attachment for this—$15 at any hardware store, worth every penny to avoid leaning posts and messed up marble.
While drilling, you have to keep the marble cool. If you don’t, the diamond bit will heat up, and the marble will crack from thermal shock. That’s a super common mistake I see. How do you keep it cool? Spray a little water on the drill bit and the hole as you go, don’t let it get dry. Go slow, too—don’t mash the drill into the marble. Let the bit do the work. I’ve had guys rush through drilling, pressing hard, and the whole marble slab cracked right through the house because of the heat and pressure. Once the hole is drilled, you have to clean it out. This is so important, and everyone skips it. Drill dust and marble shavings will get in the hole, and the epoxy won’t stick. How do you clean it? First, use a small brush (a pipe cleaner works great for small holes, or a compressed air can if you have one) to get out as much dust as possible. Then, spray it with isopropyl alcohol, and use a rag to wipe out the hole, then blow it out with compressed air again. No dust left, I repeat.
Now, setting the post. Let’s talk about base plates for a sec—some posts have pre-drilled holes for anchors, some don’t. If your post has a solid base plate with no pre-drilled holes, you’ll need to mark your own holes after you set the base plate on the marble. That’s why tracing the plate earlier was important. Once your holes are drilled and cleaned, you mix your epoxy. Follow the package instructions—don’t mix more than you can use in 10 minutes, because epoxy starts curing fast. Too much mixed, and you’ll have a glob of hard epoxy on your hands before you even set the post. Squeeze the epoxy into the hole, about ¾ of the way full. Then, slide the anchor into the hole, twisting it slightly to make sure the epoxy spreads evenly. Wait about 5 minutes (check your epoxy’s cure time, it varies) for the epoxy to start getting tacky, then set the post’s base plate over the anchor and your pre-marked hole, and insert the bolt. Tighten the bolt just enough to hold it in place—don’t crank it down super tight. If you over-tighten, you’ll crack the marble from the pressure. Use a level to double-check that the post is perfectly plumb (straight up and down) in both directions (front to back, side to side), and then let the epoxy cure completely. Most structural epoxies take 24 hours to fully cure, so don’t go leaning on the post, hanging stuff on it, or driving over it for at least a full day. I always tell people to wait 48 hours just to be safe, especially if it’s in a high-traffic area.
Wait, what if you can’t drill holes in the marble at all? Like, if you’re installing guardrail posts on an existing marble floor that’s a historic landmark, or a super valuable residential patio where drilling isn’t allowed? Oh, that’s a whole other scenario, and I get that a lot. For that, you need a heavy-duty structural adhesive that’s made specifically for vertical or horizontal surfaces on natural stone, not just general construction adhesive. Again, skip the cheap stuff—go for the same two-part structural epoxy I mentioned earlier, but make sure it’s rated for surface bonding, not just anchoring. Here’s how that works: clean the marble surface really well (wipe it with isopropyl alcohol, no oil or grease), apply a thick bead of epoxy around the edge of the post’s base plate, set the post on the marble, press down firmly, and wipe off any excess epoxy that squeezes out immediately. Then, clamp the post in place, check it’s level, and let it cure for 72 hours before touching it. I’ve used this method on historic museum marble walkways where drilling was forbidden, and it’s held up for 5 years now with no issues.
Now, the mistakes I almost always see that ruin everything. First, using the wrong drill bit. Regular masonry bits will chip the marble, I’ve seen it so many times. Second, not cooling the drill while drilling—thermal shock cracks marble faster than anything. Third, not cleaning the hole before setting the anchor. Drill dust is epoxy’s enemy, and it will make the post come loose over time. Fourth, over-tightening the bolts. I’ve had guys tighten the bolt so hard the base plate pushes down and cracks the marble right under the post. Fifth, using a too-small base plate. A 4×4 plate on a marble slab that’s only an inch thick is just asking for cracks. Upgrade to a wider plate, it’s worth the extra $5 for a better post.
At the end of the day, installing guardrail posts on marble is doable, it just requires a little extra care and the right materials, not just grabbing whatever you have in your toolbox. If you’re a contractor working on a public plaza, or a homeowner doing a small patio project, don’t cut corners here—you’ll end up paying more to fix a cracked marble slab than you would have spent on the right posts and epoxy.
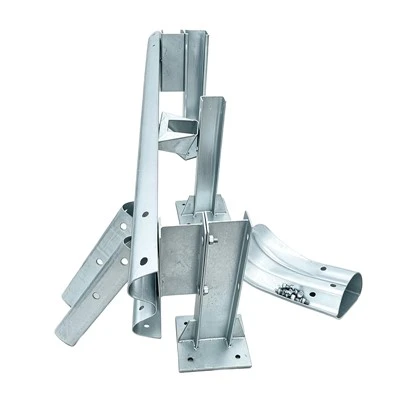
If you’re ready to stock up on the right guardrail posts, epoxy anchors, and diamond bits for your marble project, I’m here to help. Whether you need custom-sized base plates, bulk epoxy, or just advice on what works best for your specific marble surface, hit me up anytime. I don’t do generic sales pitches—we can talk through your project, figure out exactly what you need, no pressure, no weird hidden fees. Don’t mess up your marble job because you grabbed the wrong materials—let’s get this done right the first time.
Bridge Guardrails References
- Natural Stone Institute. (2021). Installation Guidelines for Guardrails on Natural Stone Surfaces. Retrieved from industry construction safety manuals for natural stone applications
- ASTM International. (2019). Standard Specification for Structural Adhesives for Natural Stone and Masonry Anchorage. Retrieved from ASTM standards for construction materials
- Marble Institute of America. (2020. Best Practices for Drilling and Anchoring Marble Slabs. Retrieved from MIA installation and care guides for natural stone architectural surfaces
Guanxian Hongrong Traffic Facilities Co., Ltd.
As one of the most professional guardrail posts manufacturers and suppliers in China, we also support customized service. Please feel free to wholesale bulk durable guardrail posts in stock here from our factory. Welcome to contact us for quotation.
Address: South side of the road, 100 meters west of the intersection of Baiyang Road and Donghuan Road, Chongwen Subdistrict, Guan County, Liaocheng City, Shandong Province
E-mail: hongrongli568@163.com
WebSite: https://www.hongrongguardrail.com/
